Local food spotlight – Mirai Sweet Corn from Twin Garden Farms

Not all corn is created equal, unfortunately. That tasteless stuff we can get in the winter from the grocery store will never measure up to the corn that’s in season from the grocery store in summer. And even better than that is local, fresh, seasonal corn from the farmers market or from our own gardens.

I found some that tops all of those, at least in my opinion, and that’s Mirai (mee-rye) Sweet Corn from Twin Garden Farms. I bought a bag of 6 ears at the Forest Park Farmers Market this past Friday, unsure of the promises that it would be the best I’d ever had but willing to try it. So good you can eat it raw, they say. Well, I have to admit I didn’t test that theory, but I did see lots of kids doing just that. Instead, we took it home to cook. We buttered it, added salt, pepper and herbs, and steamed it in foil. 10 minutes at 375 deg F, then flip for another 10 minutes.

One word: YUM. Okay, maybe two. Really yum. I’m usually skeptical of such bold advertising because so often it doesn’t pan out in the final product, but they advertise so confidently because in this case, it’s true. It’s genuinely sweet without what they that starchy flavor. I didn’t even realize what they meant until I had some and noted that indeed there was no starchy flavor. The texture is excellent as well. Even better, they’re from Harvard, IL, and they’ll ship you that corn while supplies last, or some seeds if you’d like to grow it yourself. Their sign seemed to indicate that the season wasn’t going to last much longer, so I don’t know if there will be any this coming market in Forest Park. However, they sell at over 80 other markets in Illinois, including the Oak Park Mid-week Market on Wednesday evenings from 4-9pm.

So go forth, and obtain some Mirai corn. You won’t regret it. We’re lucky to have it so close.

Posted in eating in season, farmers markets, farms, food, local businesses, local food | 4 Comments

Wordless Wednesday

Harvest 07/31/10

Posted in gardening, photos, wordless wednesday | 3 Comments

Local food spotlight – Melrose Peppers

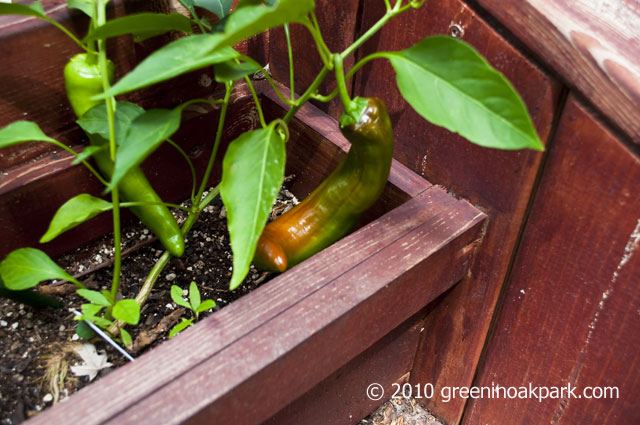
In May I bought a Melrose pepper plant from the Cheney Mansion Plant Sale. I had no idea what it was, but I felt somewhat adventurous, and I went home to plant it in a small container on the side of my deck. It quickly grew a rather enormous green pepper.

Melrose Pepper

I researched it a bit – and I say a bit because there isn’t a plethora of information about it online. I love this story of a local family who still grows it, and from what I can tell from this page and others, it’s an heirloom pepper from Italy brought to the States and grown in nearby Melrose Park. Hence the name. They’re good for frying and after they ripen on the vine they are very sweet, sweeter than bell peppers even.

So I eagerly waited for the pepper to ripen. And waited. And waited. I wondered – was this thing ever going to turn red? It had been there for going on two months, completely unchanged and looking quite ready to fall off the vine from the sheer weight of it.

Finally, about a week ago, the very bottom started to turn red.

Ripening Melrose Pepper

I don’t have a more recent picture, but it gets a little more red every day and it’s mostly red now, having gone through a rather ugly green-red combination period. My husband said it looked like a bowling shoe. 😉 I should be able to pick it this week, so I’d better figure out what to make with it, no? As you can see, now there’s a second one on the plant now as well, and it’s big enough to use if I want to use it while it’s green.

The racetrack mentioned on the page about the Melrose Park family is not quite walking distance, but it’s probably a 10 minute drive. Now that is local.

Posted in food, gardening, local food | 13 Comments

Homemade Sweet Relish

Pickling cucumbers are getting a workout here at Chez Green In Oak Park. Earlier in July, I mentioned making homemade pickles. I ran out of room trying to long-brine pickle many of them in casserole dishes, so I got a tall glass container that’s functioning as a pickling crock in the fridge.
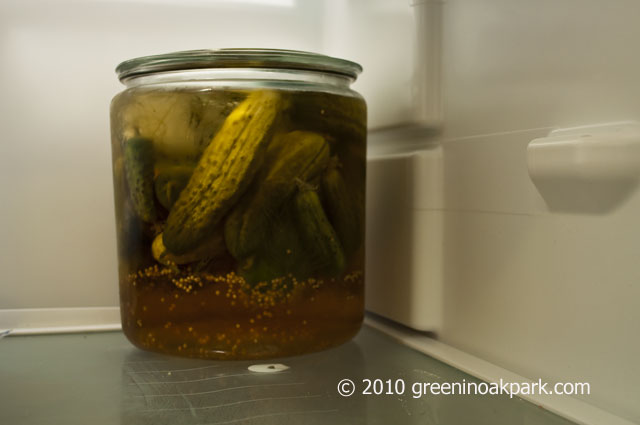
Pickle Crock

Inside, I have a small Pyrex bowl holding down the cucumbers so that they remain in the brine. The top of the container is upside down so that the handle provides a little more pressure on the cukes. They’ll last months this way and as I mentioned, I can add more as I harvest them. If they don’t get eaten in time, I might can them.

I didn’t want only pickles, however. I also wanted some sweet relish because we use it a lot. So how convenient is it that I’m still getting some pickling cucumbers from my community garden plot AND that both the Oak Park and Forest Park farmers markets have plenty of pickling cucumbers for sale? Very convenient, I tell ya. So I found a recipe for sweet relish, bought some pickling cucumbers, pulled out my canning equipment, and off I went.

The recipe I used is based on this one, but I made some changes. I ran the veggies through the blender briefly and on the lowest setting so it would be less chunky, I skimmed off the whole mustard seeds in the vinegar mixture after a few minutes so they would add flavor but not crunch, I replaced the celery seed with turmeric, and I used only one red pepper. I also doubled the recipe, but I got 8 half-pint (8 ounce) jars rather than the expected 6. I processed these in 2 batches of 4 jars each, and towards the end of the second batch, I started skimming veggies out of the liquid and pouring off a bit of the liquid as I filled the jars because I had slightly too much liquid. That liquid was added to my compost bin after it cooled. There was still plenty of liquid in each jar, as it’s important to keep them acidic and sugary enough that you can process in a water bath canner rather than a pressure canner.

What you’ll need

– 8 cups finely minced (blended briefly on lowest setting is fine) cucumbers, the stems and ends not included
– 4 cups finely minced (blended briefly on lowest setting is fine) onion
– 1 finely minced red pepper
– 1/2 cup salt appropriate for pickling/canning
– 7 cups sugar
– 4 cups cider vinegar
– 2 tsp turmeric
– dish towel laid out on the counter
– shallow, wide pan
– very tall stockpot with tight-fitting lid or commercial water bath canner
– large pan
– canning jar lifter
– butter knife
– very large bowl
– strainer or colander
– 8 half-pint canning jars with new lids and bands

What you’ll do

In a very large bowl, mix together the minced cucumbers, onion, and minced red pepper. Sprinkle the salt on top and cover with cold water. Add ice cubes if you like, and leave at least two hours. In the morning or after 2 hours, pour out the water, strain, press out additional liquid – I used a potato masher – and strain out the water again. Do this several times until there’s very little water coming out of the bowl when you strain.

In a shallow, wide pan, heat up 4 half-pint (8oz) jars in about an inch of water. Do not boil.

In the very tall stockpot or canner, put your canning rack in the bottom and fill with enough water that your jars can sit in it and be covered with at least 1-2 inches of water. Heat to a simmer.

In the large pan, heat the vinegar, sugar, and spices to boiling.
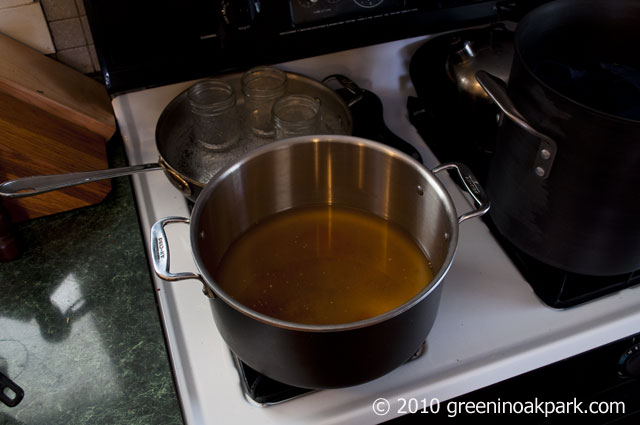
Boiling vinegar and spices

Add your veggies to the pan and bring to a boil again.
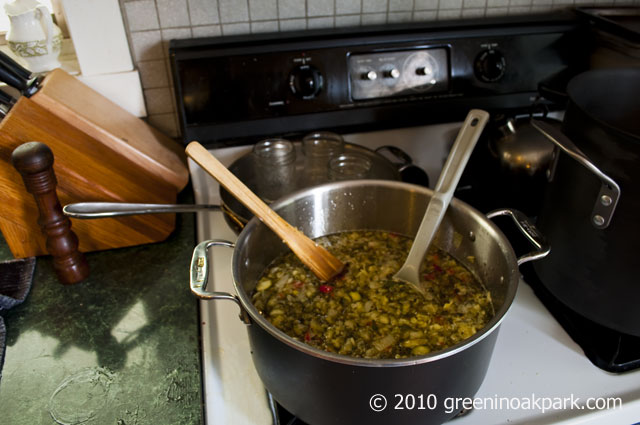
Boiling Relish

Please ignore the mess on the counter, if you would. 😉 Realism wins over Photoshop today.

Remove your jars from the hot water with a canning jar lifter and place on your dish towel on the counter. Place a canning funnel in one and fill with relish, leaving 1/4 inch of headroom at the top. Push out any air bubbles with a butter knife. Wipe off the very top of the jar with a towel. Place a lid on the jar, screw on a band to finger-tightness, and fill the next jars in this batch in the same way.

Place the jars in the canning rack, cover the very tall stockpot, and simmer for 10 minutes, more if you are above sea level. Your canning jars will likely have instructions with adjustments for areas above sea level. After the time is up, remove them with your canning jar lifter while being careful not to burn yourself and place them on the dish towel to cool. Shortly after, you should hear a “ping” as each jar seals. Test when they’ve cooled a bit by looking to see if the lids are slightly concave, by pressing on the center and making sure they don’t give and/or pop back out, and then later by unscrewing the bands and lifting the jars by the very edges of the lids to make sure the seal does not move. If you do this, store without the screw bands because the putting it back on can move the lid enough to break the seal. If any haven’t sealed properly, you can reprocess if it’s immediately after. Store upright.

If you’re doing more than one batch, leave the relish in the big pan at near simmer and bring back to a boil briefly before repeating the process of filling the jars. Then repeat the water bath process.

Voilà, relish!
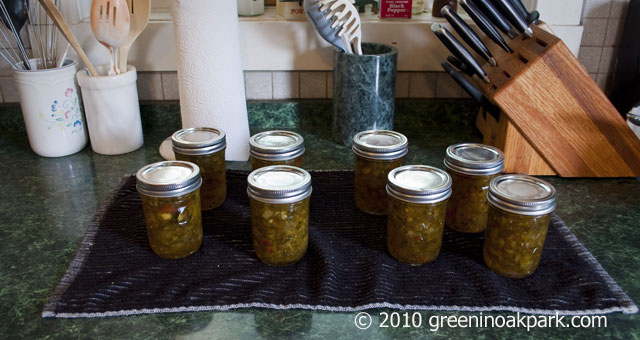
8 jars of sweet relish

Just a reminder: the caveats about not using these blog entries as complete canning instructions, as outlined here, STILL APPLY. Read Putting Food By or another canning bible, take a class, and do your research.

Also, this obviously isn’t a low-sodium or low-sugar recipe. It is, however, vegan and gluten-free.

This most certainly doesn’t save time, obviously. It takes much less time to pick up jars of relish from the grocery store when I happen to be there. But this does save money while still giving me relish that’s probably better than store-bought. I paid about $10, probably a little bit less, for the cucumbers, sugar, vinegar, spices, and red pepper, and I got 64 oz of relish total out of it. If I’d bought an equivalent amount, let’s say six 10oz jars from the store, I would have paid at least $15 for the good stuff, without the satisfaction of having made it myself.

Got any good relish recipes you’d like to share, whether it’s cucumber-based sweet relish or another kind? Comment away.


(Full Disclosure: If you use these links to buy these items from Amazon, Green In Oak Park does get a small kickback. No pressure to use them, of course.)

Posted in diy, eating in season, food, food preservation, food storage, frugal, gardening, local food | 1 Comment

Reusables over disposables progress report

So I mentioned a while back that I was on a mission to replace disposable items with reusable items as much as possible. Here’s a progress report.

– Replacing plastic wrap and sandwich baggies with things such as Wrap-N-Mats. This is going pretty well, and it’s pretty easy. They get washed by hand and left inside out to dry. They fit sandwiches, cheese, and generally anything that would normally go in plastic wrap. These will pay for themselves eventually.

– Replacing tissues with flannel hankies from Sustainable Homestead. It’s unanimous in this house; we love these hankies. They’re soft and much easier on noses than tissues. They absorb well and wash well. What’s not to love? These also will pay for themselves, if they haven’t already.

– Replacing paper towels with cleaning rags. Actually we’ve used rags for a long time, but when we don’t want to ruin a rag because whatever we have to clean up is just that bad, we’ll use a (recycled) paper towel. So I can’t say there’s zero paper towel use here.

– Replacing dish sponges with dish rags. Sponges do last a long time, but in order to keep the teeming bacteria monster away, they have to be sanitized often, such as in the microwave or in the dishwasher. They’re also not the greenest crayon in the box, so to speak. Instead we now have lots of washable dish rags made of cloth and use one per day, and this is yet another reusable that will pay for itself.

Some future projects include replacing cotton squares used to remove makeup with more flannel hankies from Sustainable Homestead. I try to use the same square several times, but something permanent would be better.

What can’t I seem to replace? Q-tips and the occasional piece of scratch paper, to name a couple. But nobody’s perfect, right?

What have you replaced? Any plans to do so, or ideas you’d like to share? Any DIY projects you’ve tried? I know we have some innovative people out there, so let’s hear about it.

Posted in beauty products, conservation, food storage, frugal, reducing waste, reusing | Leave a comment

Electronics recycling in Oak Park

9am – noon, Saturday July 31, 2010 and Saturday August 28, 2010 at the Public Works Center, 201 South Blvd, in Oak Park. This makes it very easy to recycle things that can’t go into the garbage. Electronics contain substances that leech into our soil and groundwater.

Check out more information here.

Posted in events, Oak Park, recycling | 2 Comments

Wordless Wednesday

Posted in flowers, photos, wordless wednesday | Leave a comment

Antiques, architectural salvage, and thrifting – oh my!

Let’s face it- re-using isn’t always easy or trendy, but it is green. And re-using can include furniture and the finishing touches of the rooms in our houses as well.

Our house was built in 1925, and rather than swimming against the tide by purchasing lots of new, modern furniture that just doesn’t look right in an older house, we put furniture from around that time in it. Really, anything from the first half of the twentieth century is fair game for us, and it’s a bonus that we prefer that old stuff. Once you get to know it, you realize it was much better built than most contemporary furniture. We had a major flood in our house once, and it certainly wasn’t the modern Ikea furniture that made it out unscathed; it was the “old stuff”. That says volumes, I think, about the value of well-made furniture, whether it’s modern or old. I can also honestly say that to me, at least, old furniture has a lot more visual interest and character. It’s as if it has acquired a soul that modern furniture hasn’t had time to acquire.

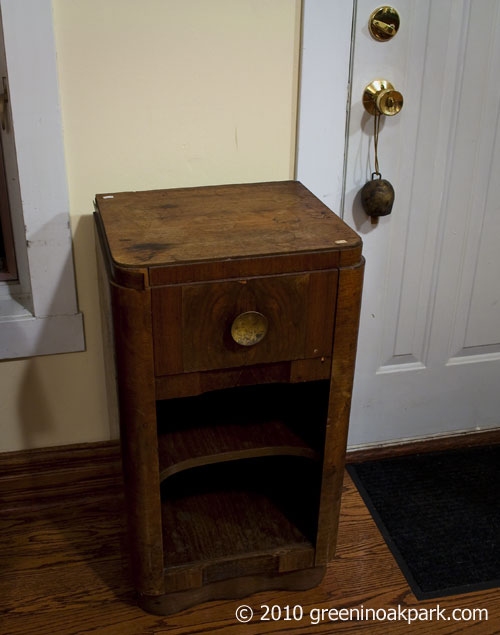
Here’s a nightstand I bought for $10 from The Brown Elephant thrift store here in Oak Park years ago – and thrift stores are often chock-full of such items. I estimate it to be about 55-60 years old, probably from the early fifties, in other words. The veneer is in bad shape, but that can be fixed. It’s not really my style, but it might be someone else’s, and it’s likely worth more than $10.

Nightstand

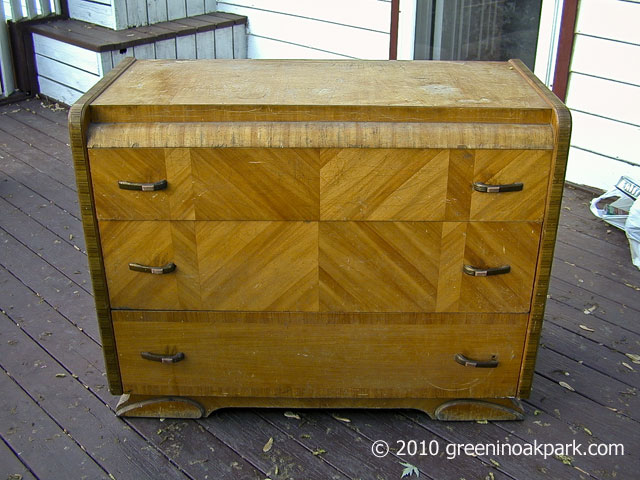
And here’s a before shot of a waterfall dresser I bought at an estate sale for $15. I’m guessing, judging by the lines, the blond finish, and what the sellers told me that it’s from the late 1940s.

Dresser before

It was very scratched and beat-up, and you can’t see just how much in the photos I have, but its bones were good. It turned out that the scratches were only in the finish, so I refinished it on the deck and now it sits in a bedroom.

Finished Dresser

I’ll spare you the myriad of pictures I took of the entire process. A modern dresser would have cost me a lot more than $15, supplies, and a time investment, so this was greener AND cheaper. The refinishing process was also my first, and it was much easier and turned out much better than I had thought.

We have a lot of antiques and vintage pieces in this house. The same bedroom that houses the finished dresser has a Jenny Lind bed frame I bought from craigslist. Another bedroom has inherited waterfall furniture along with a few other similar pieces I found on craigslist and at thrift stores, including a Roos hope chest in the waterfall style. Waterfall was popular from about the 1920s through the 1940s.

And speaking of thrifting and estate sales, if you’re into midcentury modern furniture (i.e., from about the 1950s through the 1970s), this is your time to find treasures at those places. Estate sales obviously result from deaths, and many who are of that age right now had midcentury modern furniture in their homes. Dealing with someone’s physical “stuff” left behind can be one of the most daunting aspects of dealing with a death and can add to what is already a very difficult time, so many families are glad to see their loved ones treasures go to good homes where they are appreciated. Furniture in thrift stores is often donated after a death as well, so those are often full of midcentury modern treasures too.

Another green tip, which happens to be frugal too: shopping at architectural salvage stores. Some affiliated with the organization benefit Habitat for Humanity, which is definitely a worthy cause, but all of them keep what would otherwise be junk out of a landfill and are filled with bargains for you. An item there will cost a fraction of what it would cost at a big box home improvement store. You can find plumbing fixtures, drawer and door hardware, doors, windows, cabinets, countertops, light fixtures, and all sorts of cool things for your house. Many of them welcome calling ahead to see if they have what you’re looking for, which can save you a trip. Consider donating such items as well if you’re remodeling.

All of this may seem obvious – when it’s pointed out, that is. It’s easy to see an unfilled need, perceived or real, and then plan ways to fill it with something purchased new. We all do it. It takes a shift in the default way of thinking to come up with ways it can be done in a more green and frugal way. I know that becoming interested in old houses, architectural salvage, and antiques has been a lot more fun for me than buying mass-produced furniture from a big store. I also enjoy looking for furniture on craigslist, and even our rather modern couch and loveseat came from craigslist. They’re a matching set, almost brand new, and we paid probably less than half of what they cost in a store. So even if you just can’t get into antiques, you can green up your furniture purchasing by looking for used. It’s not unlike a treasure hunt, and the thrill is in the chase, I like to say. 😉

Posted in antiques, diy, frugal | 2 Comments

Blackberry Jam

Blackberry season is upon us, and the blackberry bush is providing about 2-4 ripe blackberries a day now. It’s not quite enough at one time to make jam, so I bought some from the farmers market this weekend.

Preserving food that is acidic, which includes tomatoes and other fruit, is much easier than preserving other types of food. Instead of the pressure canner that is required for safe canning of vegetables, you can use a water bath canner, which is basically a large stockpot with a tight lid and a rack you can place in the bottom. The jars go in the rack. This way they don’t knock into each other and break, and there’s water under the bottoms of the jars as they process. This is necessary for safe water bath canning so that the food in the bottom is heated to an adequate temperature to kill any microbial nasties. A very tall stockpot with a round cooling rack in the bottom is also fine for this purpose, as long as the jars are covered by 1-2 inches of water as they’re processing, and as long as the lid fits tightly.

The blackberry jam I made is a variation on the recipe in Putting Food By, which I still recommend as a classic on food preservation. They call for equal parts blackberries and sugar, which is fine to do because blackberries are naturally high in pectin already. Other fruits require added pectin. They also recommend boiling your mashed fruit and then putting it through a food mill to get rid of seeds, then re-adding to the pot to continue. I opted not to use the food mill.

Here’s how I did it, and in the proportions I used. You can safely double this recipe, but no more than that because pectin isn’t all that cooperative beyond doubling.

What you’ll need

– 1 very tall stockpot with round rack and tight lid
– 1 pot with an inch or two of water in the bottom
– 1 kettle/pot for boiling the fruit mixture
– 3 (four) 8oz canning jars with new lids and bands, or 6 (six) 4oz jam jars
– canning funnel, available in canning kits
– dish towel spread out on the counter
– jar lifter and canning tongs, available in canning kits
– 2 cups mashed blackberries (I used a potato masher)
– 2 cups sugar
– about 1 tablespoon regular pectin, though you can add more for firmer jam and less for less firm jam, and I’m adding it because I think even a little pectin makes for a better jam

What you’ll do

In the very tall stockpot, place the rack at the bottom and fill with enough water to cover a jar that’s sitting in the rack with 1-2 inches of water. Heat to boiling while you perform other tasks.

In the pot with an inch or so of water in the bottom, place all your jars in the upright position as well as the lids. Heat on medium-high heat. It’s not necessary to boil, but keeping them hot helps prevent breakage when you put your hot jam in them.

In the third pot, add your mashed berries and heat while stirring in your pectin. Keep stirring constantly, then stir in the sugar. Boil at a rapid, hard boil (meaning it can’t be stirred away) for a minute or two.

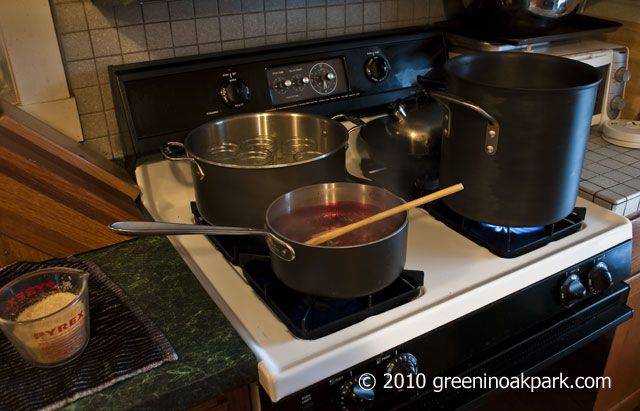
Ideally you’ll have all three going at once to save time.

Busy stove

After the jam has boiled for a minute or two, skim off the thin layer of foam at the top (which you can save for fresh jam if you like), remove the jars from the hot water with a jar lifter and place them upright on the dish towel. Place your canning funnel into each jar and pour or ladle the jam into the jars, leaving 1/4 of an inch head room on top. The funnel should prevent any jam from getting on the rim, but if it does, you must remove all of it before processing or it won’t seal properly.

Remove the lids from the hot water with the tongs and place them securely on the jars. While holding the jars with an oven mitt or a corner of the dish towel, take a band and screw it tightly on each jar by hand.

Hopefully by now your very large stockpot is almost at a boil. When the water is at a rapid boil, use your jar lifter to lower the jars into the rack. You can lift the rack out, put jars in, and then lower it back in if you’re more comfortable with that method. Cover and turn down the heat enough that the rapid boil continues but doesn’t boil over, and process the jars for 10 minutes. If you’re above sea level, check to see how much longer you should process the jars. Your pectin probably has that information included.

When time is up, use your jar lifter to remove the jars and put them on the dish towel, or pull the rack out and put it on the dish towel and then lift them out with the jar lifter.

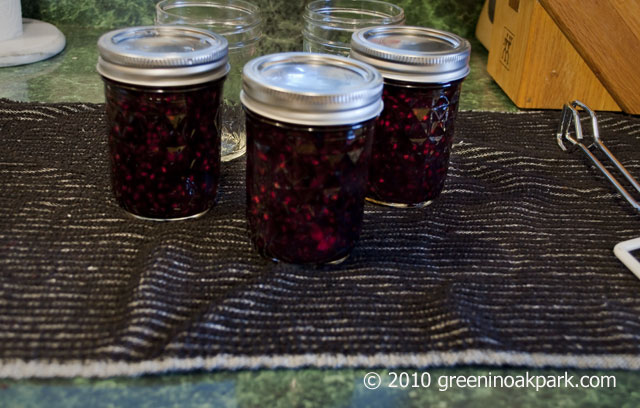
Blackberry Jam

Within a few minutes, you should hear a click as the lids seal. They should cool before you open them, and you should test the seal before putting them away. The easiest way to do that is to hold the jar over a pot with a dish towel in the bottom, unscrew the band – although if you have to use lots of force, that might unseal your jars – and then pick up the jar with the edge of the lid. The lid shouldn’t budge and the jar shouldn’t fall. The lid also shouldn’t depress at all if you press it in the middle. If the lid depresses or if the jar can’t be lifted by the lid, then you can re-process, but it’s safest to refrigerate it and eat it right away.

ALL THAT SAID. I really do encourage you to pick up Putting Food By or another reputable canning book, or to take a class or learn in whatever way is best for you. Proper canning technique can mean the difference between botulism and no botulism – and botulism can be deadly serious, if you know what I mean. As this is primarily a recipe and not a tutorial on canning, I have omitted some principles of canning, such as never reusing lids and other safety procedures, but anyone who cans should know them. Although I’m hoping to learn this year, I haven’t even canned with a pressure canner yet, so I am not at all a master canner. I don’t want anyone getting sick out there.

Have fun extending the season, and happy (and safe!) eating!


Posted in eating in season, food, food preservation | 1 Comment

Solazyme and the US Navy Jets

Solazyme, a Bay Area company, has developed biofuels and renewable oils from algae, and it has delivered 1,500 gallons of its Solajet HRJ-5 fuel to the US Navy for use in jets.

This certainly looks promising so far, as dependence on fossil fuels has caused huge impediments to the widespread use of clean, renewable, sustainable sources of energy. We’re stuck in a rut, and it’s in enough powerful people’s interest to keep us there that we need a big push and somewhere to go, so to speak. We don’t have sources that produce as much usable energy as coal and petroleum, in general. Solazyme has produced much more oil than its algae fuel/oil competitors because it has eliminated the need for water, which precludes the need to separate the oil from the water and in the final stages of production the need for space that other biofuels require.

In looking at this with a forward-thinking yet critical eye, I wonder a) if we can use this oil in other vehicles besides Navy jets b) if the process by which it is produced is both is sustainable and clean and c) if this fuel burns cleanly. In theory, we certainly can use this fuel and oil in other transportation capacities, even if we don’t currently, but I don’t know how sustainable production is. The algae eats sugar, but sugar still requires space. Sugar must still be grown. How much sugar would we need to grow to feed to how much algae that would, ultimately, power our cars, buses, trains, and planes? I don’t know the answer to that. I do know that according to Solazyme, their fuel reduces CO2 emissions by up to 95%. As long as it doesn’t emit lots of other greenhouse gases, this seems promising.

So, in short, I look to Solazyme with optimism, even if all my questions are not yet answered. I’ll keep on this and let you know what I find.

Posted in alternative energy | 1 Comment